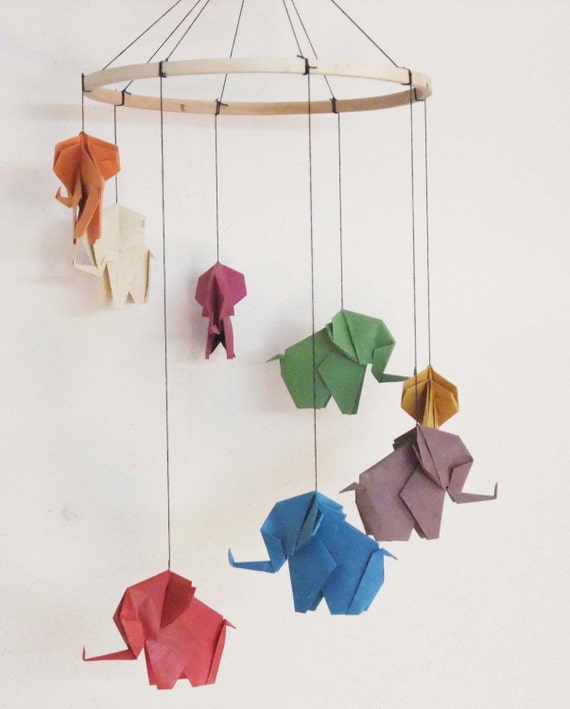
I just finished my first big DIY for the nursery/kids room!
So this may be news to some of you, but I really like elephants. And Africa. So you can imagine how excited I was to find this bedding at Target when I started looking into the design for the nursery/kids room. The bedding for both the crib and twin bed come from a set called Etosha at Target.
Here's the crib set to give you an idea of the style:
So, with that as our basis I started envisioning the rest of the room! So much fun!! I found this mobile on Pinterest and really liked the style, but not the $50 price tag shipped from Sweden through Etsy!
So I decided to make my own version for way cheaper.
That way I could pick exactly the colors I wanted too! After a quick trip to Hobby Lobby I was ready to go.
Here's what you need:
Origami paper: $5.99 (-$2.40 with Hobby Lobby's 40% off coupon)
10" Embroidery Hoop: $1.69 (only the inner ring is used)
Thread: $2 (~12 yds. I already had black button weight, so I used that)
Hand needle: (longer is more convenient but not necessary)
Metal ring: 10/$2 (I pulled one off an old keychain)
{Optional} Bone folder (aka "paper creaser"): $3.99
{Optional} Small beads
I spent less than $10.00!!
Way more manageable than $50 and in exactly the colors you want!
Way more manageable than $50 and in exactly the colors you want!
So obviously, step one is making your elephants! I picked out 9 colors that matched the bedding and then did a good old Google search for origami elephant patterns. I ended up using the video linked here. She gives very clear instructions, which is great for your first elephant or two, but seems pretty slow once you know what you're doing. I ended up making two individually and then the other seven I made assembly line style, pausing the video every few steps.
Eventually you will have your own little herd of elephants!
Once they are all made, it's time to assemble. Take the inner hoop from your embroidery hoop. This will be what keeps the elephants separated out evenly. You can do lots of math to find the exact positions of your nine strings, or if you're lazy like me, you can estimate and slide them as needed.
Tie the strings with a tight knot, wrap around the hoop a few times and then tie again. Trim the ends. Repeat this in the same locations so there are strings tied in both directions (9 to hang from the ceiling and 9 to hold elephants). Our mobile will hang from the ceiling and I wasn't sure the length it would need to be, so I cut all my strings about 2 feet long, but that was probably overkill.
If you want, you could now add beads to each upper string that would sit above the ring as decoration. Hold the ring firmly on a flat surface and gather the upper strings (the ones that will attach to the ceiling) so they come together about 6 inches over the ring. Look straight down at the ring and make sure the spot you have them pinched is directly over the center of the circle, pulling the strings tight - but don't let the ring come off the table. This will make the ring hang level with the floor, so take your time! When you're satisfied, tie a simple knot at the point where the strings are pinched. Divide the strings into 3 sets of 3 and braid them to the end. Knot the end and then knot on the key ring.
Hang the mobile from something to help manage the strings (I used the pull cords on a ceiling fan) as you attach the elephants. Thread a string through the needle and poke down through the back of the first elephant. I found that the point about 1/4" closer to the trunk from the "X" formed by the foldlines made them hang pretty level. Be sure to hang them in the order you want them! Tie a thick knot (page 2 of this pdf shows how to do this) in the bottom of the thread. Another (possibly better) option is to tie on a small bead. Trim the thread below the knot and carefully slide the elephant down onto the knot. Once you have the mobile hung where it belongs, you can change how low the elephants hang by either re-knotting the thread and trimming it shorter or by wrapping the thread around the ring.
TADA - your very own $10 origami mobile!


2 comments:
Hi Cynthia! We just used a threaded O-ring. Since the mobile is really light we didn't worry about doing anything more heavy duty or even anchor it.
Post a Comment